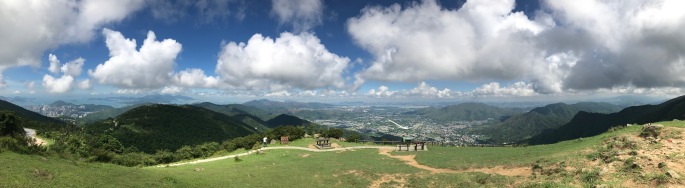
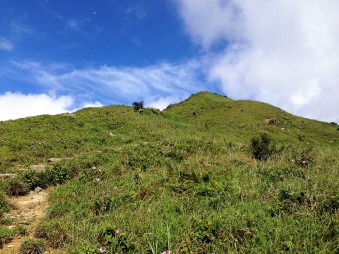
The peak of Tai Mo Shan is the highest point in the whole of Hong Kong, sitting 957m above sea level. There are many ways to hike this giant monster – I definitely cheated and decided to drive all the way to Tai Mo Shan Road Top Car Park, which is already around 880m above sea level! There’s only one road up from the carpark so unfortunately (or fortunately), there won’t be much text regarding the hiking route.
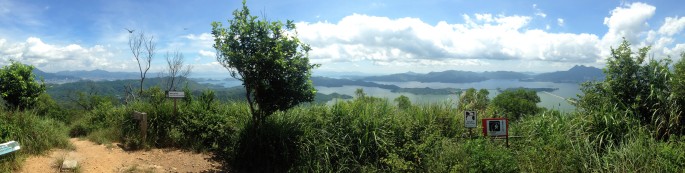
The car park situates nicely next to a lovely lookout with a massive field of grass, looking out to the lands of Yuen Long, and Shenzhen, China beyond the sea border. This place is great for a picnic on a nice sunny day!
Lookout just beside the carparkYuen Long District and Shenzhen behind the sea
I also decided to walk a bit down along the car route to other lookouts which faces back at Hong Kong Island and Lantau Island.
Walking a bit below car park to other lookouts
Walking along the car route
Glimpses of Hong Kong Island and Lantau Island
To get to the peak, head back to the car park and follow the car road up. It’s a gentle windy incline the whole way without any staircases. The more you ascend, the better the view.
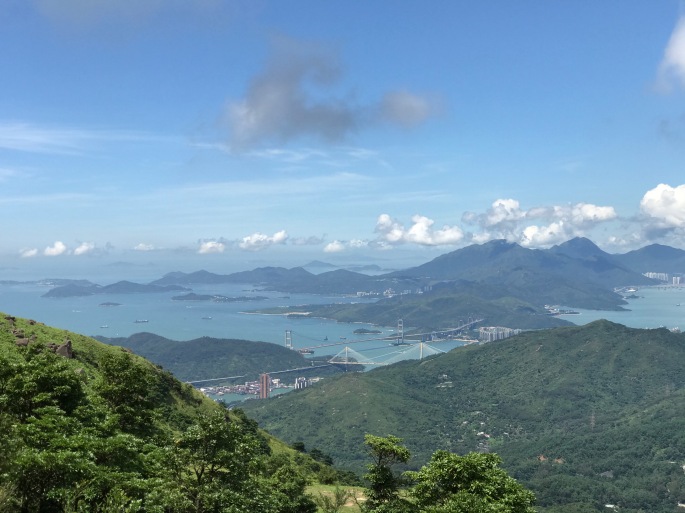
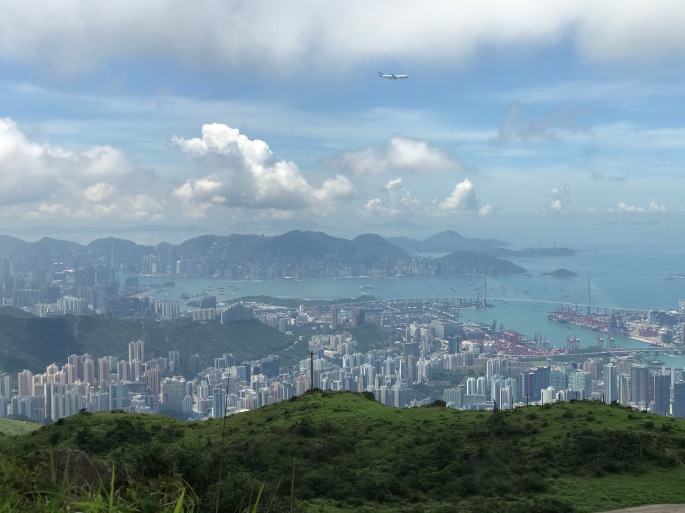
A better view of Lantau Island with the bridges that connect the different islands of Hong Kong
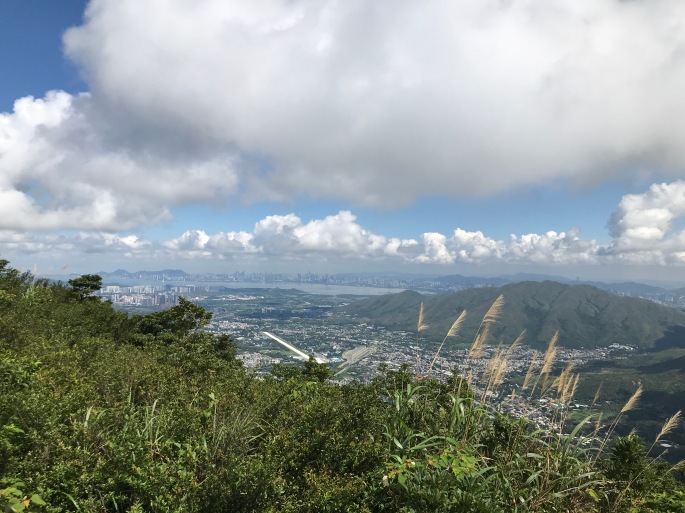
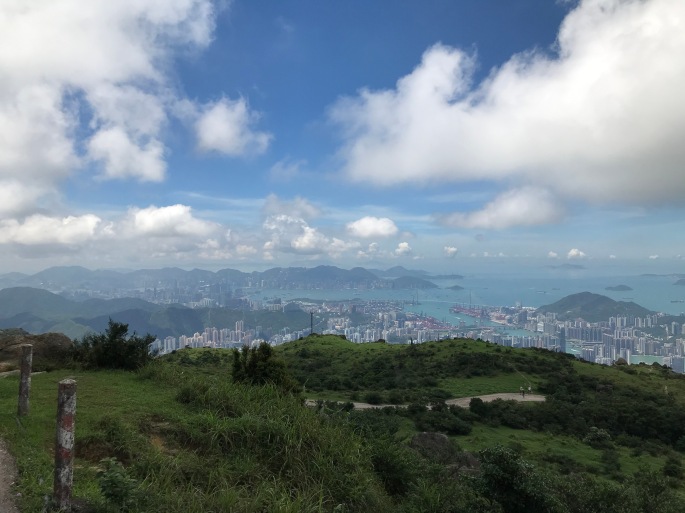
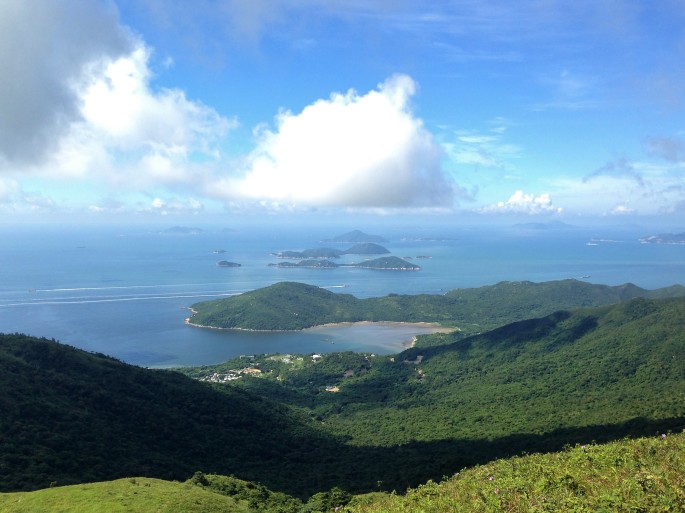
At one point, you’ll get a panoramic view from the Lion Rock all the way to the Lantau Peak – allowing you to appreciate the amazing urbanised infrastructure of Hong Kong.
Windy incline of the route – with a panoramic view of the whole of Kowloon and Hong Kong IslandUrban Hong Kong
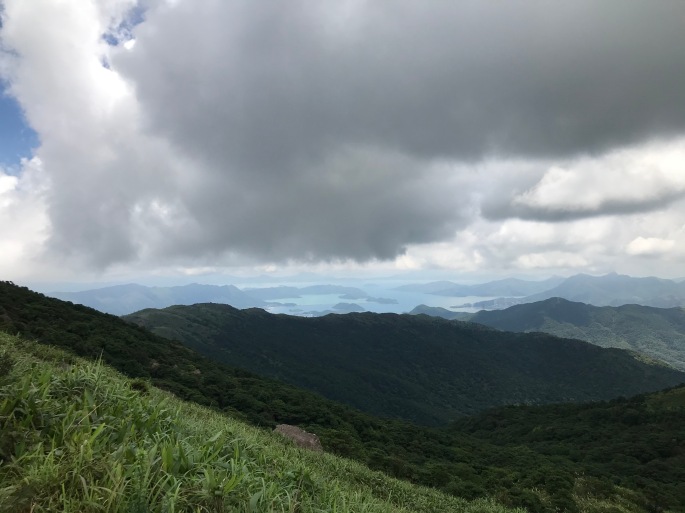
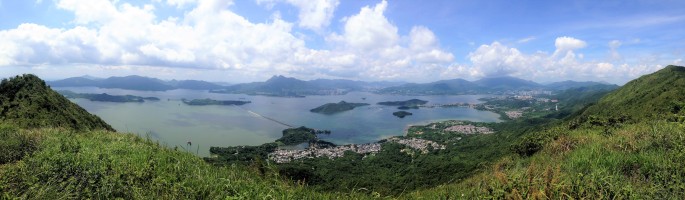
As you walk further up, glimpses of Sha Tin will come into view, including Pat Sin Leng.
The waters of Sha Tin – with Pat Sin Leng in the back
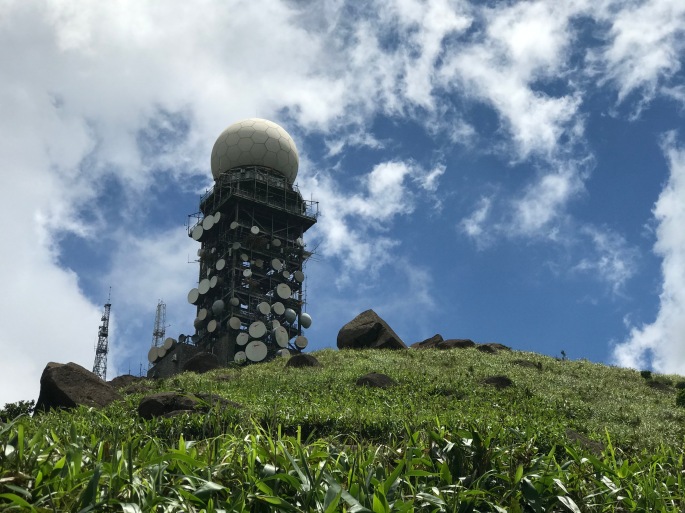
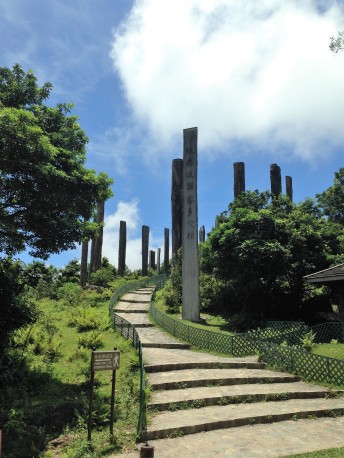
Not long, you’ll reach the peak – the Tai Mo Shan Fire Lookout Station! The view at the very top is surprisingly not as jaw dropping as along the route – but hey you’ve made it to the top of Hong Kong – that’s something to claim.
Hong Kong has 17 reservoirs and 9 irrigation reservoirs. They were built as a source of local fresh water supply by the British during colonial times. Many of the reservoirs have family trails built around it. Tai Tam Reservoir is one of such reservoirs with a water heritage trail that takes you through the history of the reservoir.
Siu Ma Shan is an extension of Braemar Hill which gives you a wonderful 360 degrees view of Hong Kong Island and Kowloon. A short detour can also bring you to the iconic sunset lookout spot of Victoria Harbour. From Siu Ma Shan, you can descend into Tai Tam Reservoir and Repulse Bay!
Duration: 3-4 hours to Quarry Bay, 4-5 hours to Repulse Bay via Tai Tam Reservoir
Views: 5/5
Difficulty 4/5
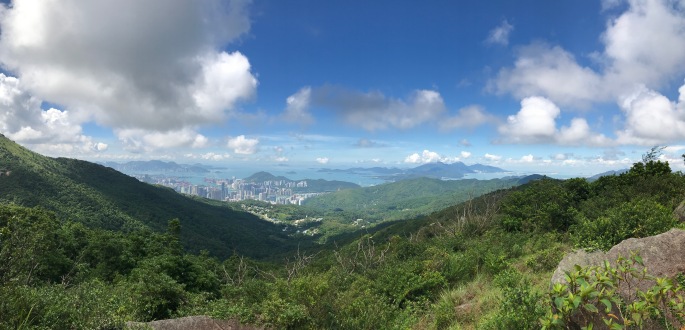
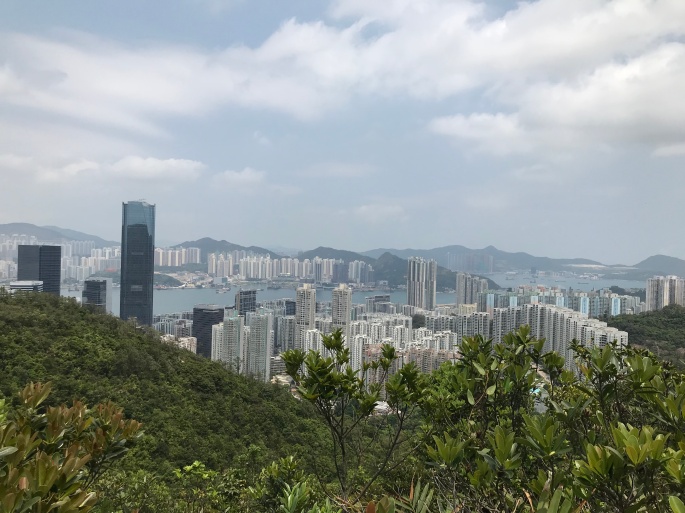
The route begins at Braemar Hill Bus Terminus near Chinese International School. This can be reached via minibuses 25 and 25A at Causeway Bay. Right opposite the bus terminus, there is a concrete alleyway on the left – this is where the trail starts. It is very well sign-posted. Not long, you’ll reach a split – to get to Siu Ma Shan, take the route on the left towards Braemar Hill. Feel free to take a little detour here on the right towards Jardine’s Lookout for Red Incense Burner Summit –where the breath-taking panoramic view of Victoria Harbour is located.
Along the route towards Siu Ma Shan, you’ll soon reach Sir Cecil’s Ride Stream Rest Area. Here, take the stairs on the right towards Siu Ma Shan. This is when the ascent begins – with many stairs to endure before reaching the top. As you walk up, you’ll get a good glimpse of Quarry Bay and its newly built office buildings. At the other end of the sea, there Kwun Tong and Lei Yue Mun, with Devil’s Peak at the tip. You’ll pass by a few receiving and signal stations along the way.
Quarry Bay (closest to you), Devil’s Peak at the other end of the seaA glimpse of Victoria Harbour on the ascent
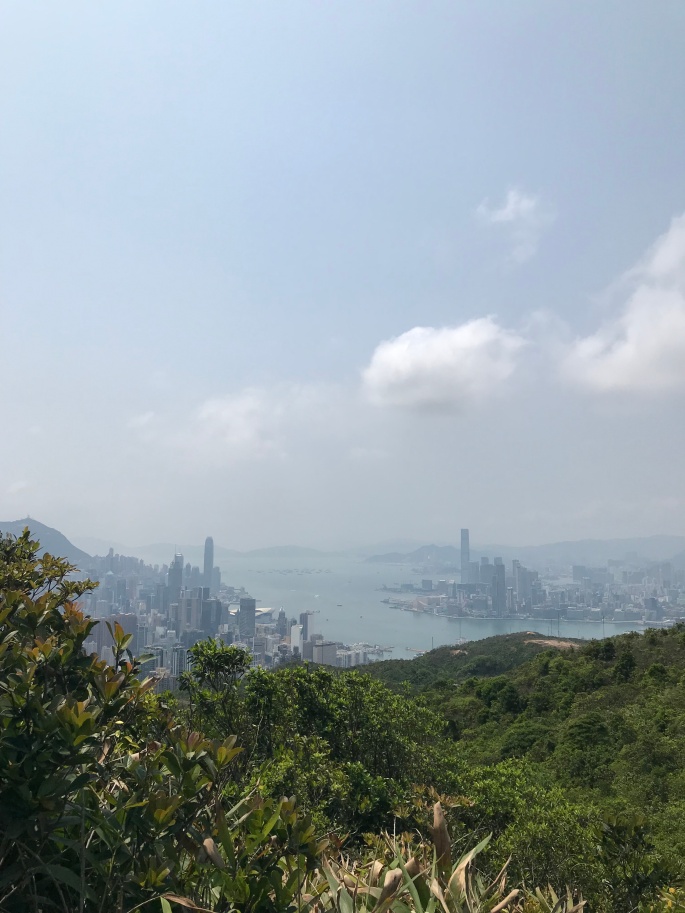
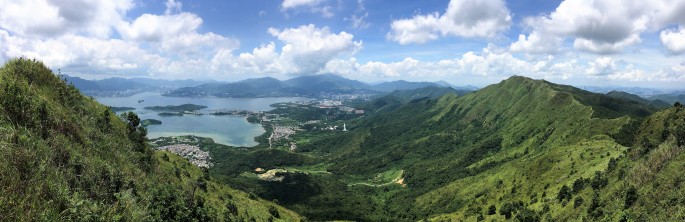
The real test begins after you’ve reached Siu Ma Shan Bridge. From the bridge, the ascent will become tougher – with less shade and just loads of stairs. Take rests every now and then – the view is spectacular the more you ascend with both the Hong Kong Island and Kowloon side in good view. As you go further up, the southern side of Hong Kong Island appears and soon you’ll see a cluster of water bodies surrounded by shorter green hills – that’s basically Tai Tam Reservoir!
Ascent after Siu Ma Bridge
En route towards the peak of Siu Ma Shan
Tai Tam Reservoir from Siu Ma Shan
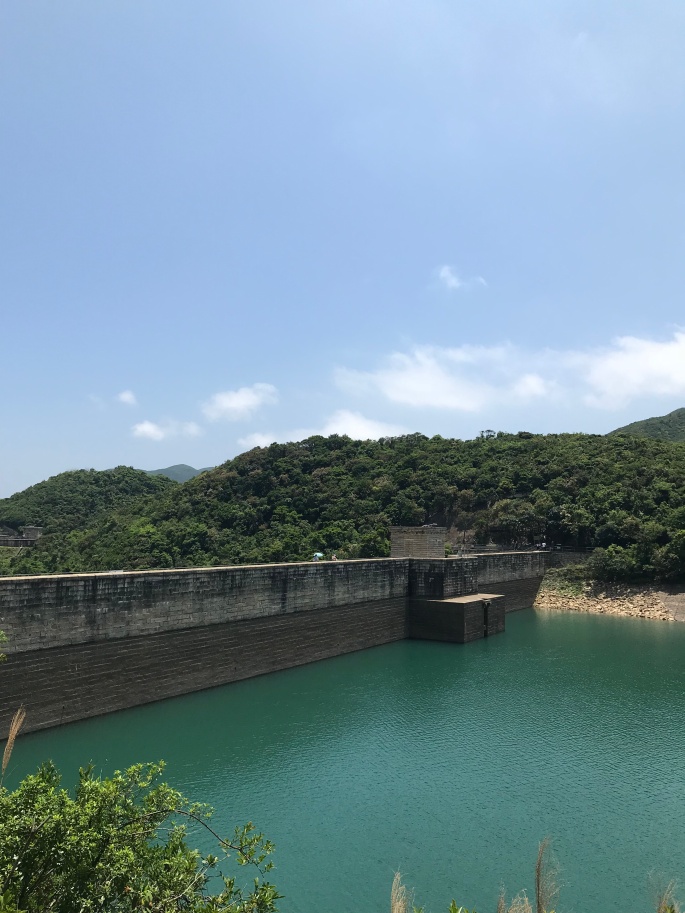
Not long you’ll reach the peak of Siu Ma Shan demarcated by a summit pole. There’s also a poster board that points out different landmarks in view at the peak. Continuing on the same route, you’ll descend into Quarry Bay Pavilion where you have a few options – you can either turn left and descend towards Quarry Bay. You can turn right which will bring you to Tai Tam Reservoir (and even further towards the Southern side of Hong Kong with many beaches for a dip!). There’s also a route which goes up again towards Quarry Pass.
Reservoir dam
Heritage Trail
How to get to Repulse Bay from Tai Tam Reservoir
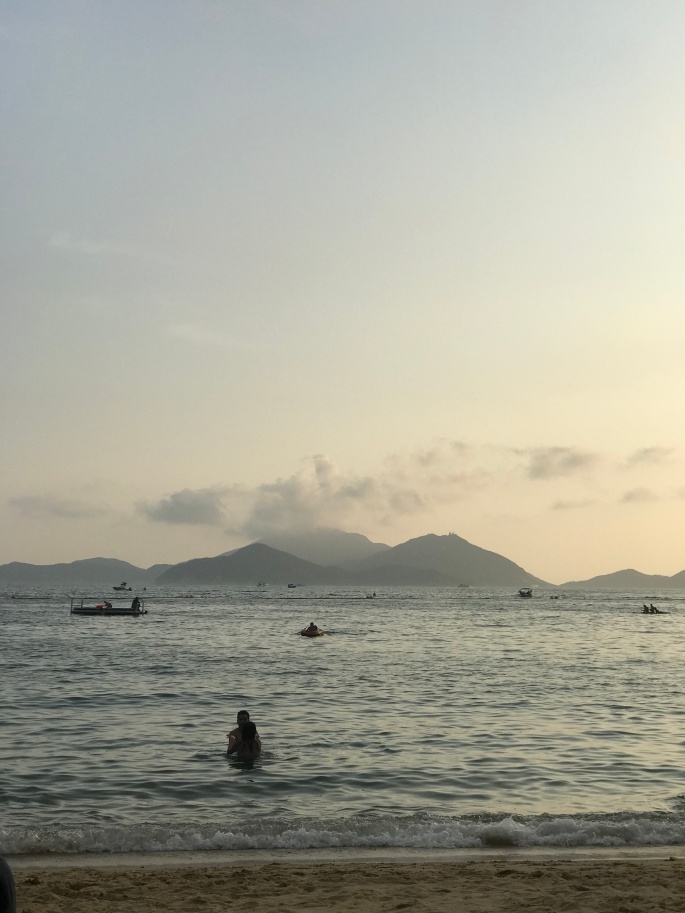
Once you cross the Tai Tam Upper Dam, follow Tai Tam Reservoir Road along Sheung Tam Stream. You’ll then pass Tai Tam Tuk Reservoir Masonry Bridge. Take a right turn once you have crossed the bridge. There will be a sign pointing towards Repulse Bay. Follow the route and in around 30-45 minutes time you should be reach Repulse Bay!
Lantau Peak is the second highest peak in Hong Kong, and is a very popular place to watch sunrise. Why? Even on a normal day, there are already a lot of clouds midway up the hill. In the morning, the sun nicely sits above the sea of fog and cloud. So yesterday morning, I was lucky to be driven up right to the start of the trail at Pak Kung Au, which is already around 400m above sea level. At first, I thought the hike was going to be quite flat, so I got 2 more mates to tag along. But, I was deceived by Google Maps. It was actually quite a steep ascent till the peak at around 950m above sea level. So to summarise, it was quite a tough hike. But we took a lot of breaks in between for photos, as well as playing around with my friends drone and vlogging. So the whole journey honestly was pretty fun.
Duration: 3 – 4 hours
Views: 5/5
Difficulty: 5/5
The route begins at Pak Kung Au. To get there, you can take any bus from Tung Chung MTR Station that goes into Lantau Island (Ngong Ping, Mui Wo, Tai O etc.) The bus will first enter the restricted area and ascend this very steep hill. This is when the bus goes very slow – almost like it’s about to run out of engine. But don’t worry, that’s totally normal. All the cars around you will be just as slow. Just endure the slowness, and get off once you reach the top of the slope – Pak Kung Au station. Cross the road to the other side, and you will see the route that leads to Ngong Ping via Lantau Peak.
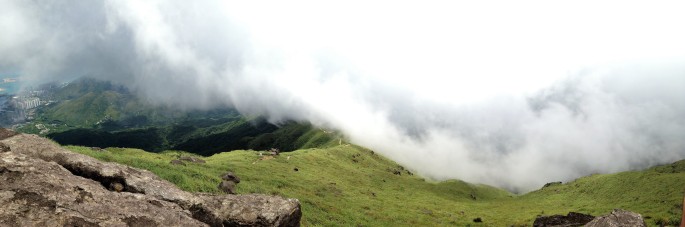
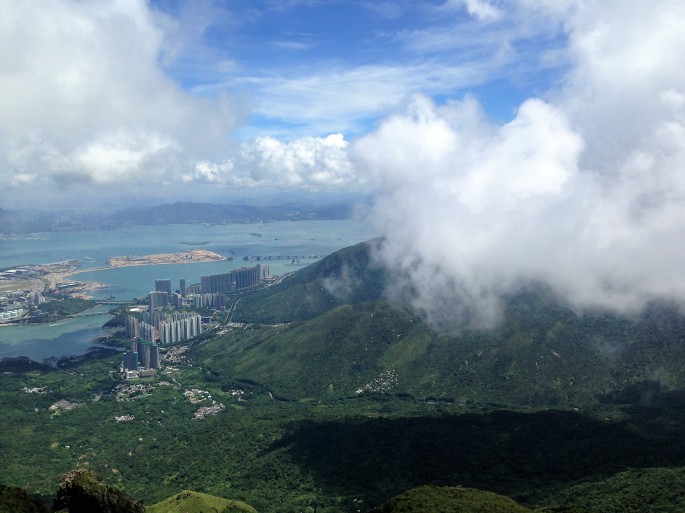
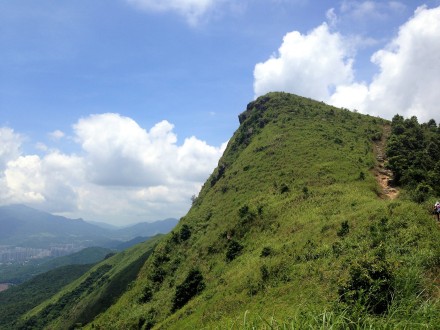
The beginning of the trail is well shaded. There are a few gentle steps up. But not long, you can already see the 3 peaks that you need to conquer. This is when you begin to regret your choice of hiking this hill. But don’t worry, there are quite a few nice resting stops up the hill for you to appreciate the views. For this hill, I do highly recommend you to fully appreciate the views. Because you are so high up, you can actually see the clouds move, and the whole atmosphere changes depending on how the clouds are like – quite mysterious when the hills are fully masked by the clouds, a bit heavenly when they are half covered (especially with a glimpse of sunlight), and the mountains just stand majestically when the sky is clear. It is also very nice to look beyond to the sea and spot little islands just popping out of the surface. On the other side of the hill, it’s the Chep Lap Kok International Airport, where you can see the planes flying right above this beautiful landscape. It’s honestly a sight to be viewed by the eye – no camera can capture this soothing moment.
The route uphillSmall islands out on the sea
Chep Lap Kok Airport
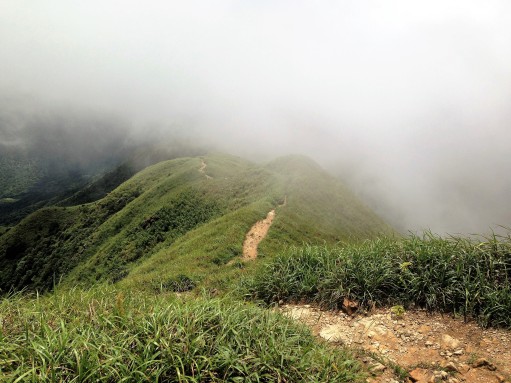
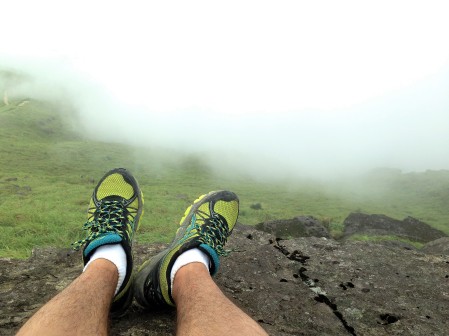
As you go higher and higher, the clouds become more and more dense. And for most of time, besides the footpath in the front, you can’t really see anything around you. A good 2-3 hours will allow you to reach the peak. Again, what you see is really dependent on the clouds. But just find any rock to sit on and chill – it’s honestly a very relaxing place to chat or even just to think about life.
Clouds sitting above the hill
Mountain ranges
The clouds become more dense as you ascendLantau Peak – a sea of clouds surrounding the mountainThe International Airport from the topChilling at a rock, surrounded by clouds
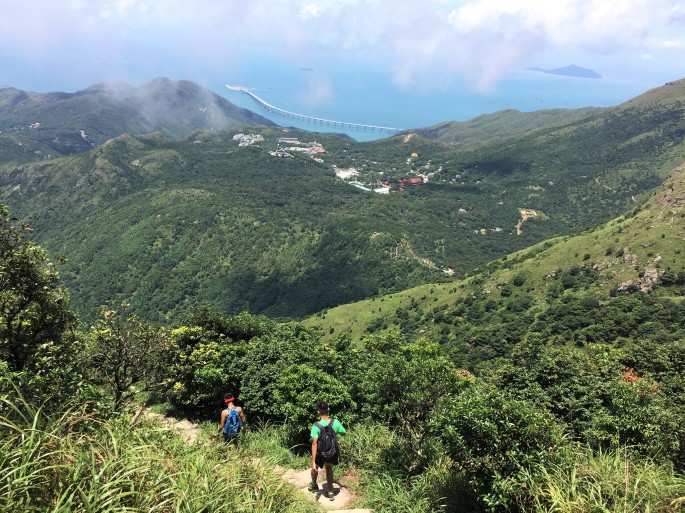
For most hikes in Hong Kong, the downhill part of the hike is not very interesting. The Lantau Peak surprisingly still continued to amaze me downhill. The clouds helped a lot. When the clouds cleared away – it was just wow. The Shek Pik Reservoir was just right in front of our eyes. The blueness of the reservoir just naturally sat in between the vast mountain range. On the right, you can just make out a statue sitting between the hills – The Big Buddha. On the far right, you can also see the bridge connecting Hong Kong to Macau and Zhuhai. The scene looks very busy, but it all somehow works together and is rather calming to watch. That’s what I really like about Lantau Island – maybe because it’s a restricted area – so it’s not heavily polluted by the buzz of the city.
Downhill – also surrounded by clouds
Sky clearing up – a glimpse of Shek Pik Reservoir
Impressive view downhill – with the clouds slowly revealing the reservoirA glimpse of Big Buddha (Ngong Ping) and the bridge connecting to Macau and Zhuhai
Downhill is a lot less strenuous than the downhill. A quick 45 minutes will allow you to reach the end of the trail at Wisdom Path, and the Big Buddha. If your legs aren’t shaking then, it is also quite worth to walk up the steps to enter the Big Buddha. If you are hungry, there are quite a few vegetarian/Buddhist restaurants around the area, as well as Hong Kong style cafes closer to the bus stop.
The Wisdom Path
To leave the area, you can take the bus or ride the Ngong Ping 360 cable car back down to Tung Chung.
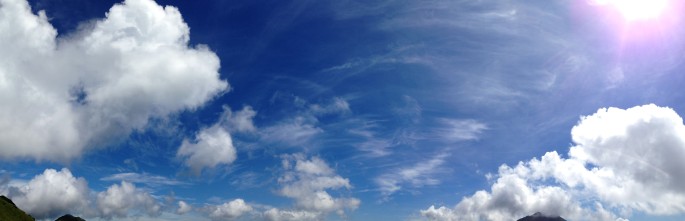
Panorama of the sky and clouds – didn’t know where to fit it in the blog but I really like it, so decided to place it at the end
Hiking Pak Sin Leng has always been on my list this summer. This is because I used to bike a lot from Sha Tin to Plover Cove Reservoir, and there would always be a row of mountains surrounding the reservoir. One of them – with 8 peaks – is Pat Sin Leng. “Sin” means fairy in Chinese – I guess the trail was named to highlight the heavenly view you get once you reach the peak.
Duration: 3 – 4 hours
Views: 5/5
Difficulty: 4/5
To get to the beginning of the trail, you can take Bus 275K that leaves from Tai Po Market to Tai Mei Tuk and walk up. Alternatively, you can drive/cab all the way to the start – as there are spaces (but limited) to park. There will be a big sign saying “Pat Sin Leng Nature Trail” – this is where you enter. The ascent has a lot of stairs – that’s the main way to reach the top. It can get quite steep, so do take your time and take some rest in between. Although mostly shaded, a glimpse of Plover Cove Reservoir and Tai Mei Tuk can be seen along the way.
A glimpse of Tai Mei Tuk during the ascent
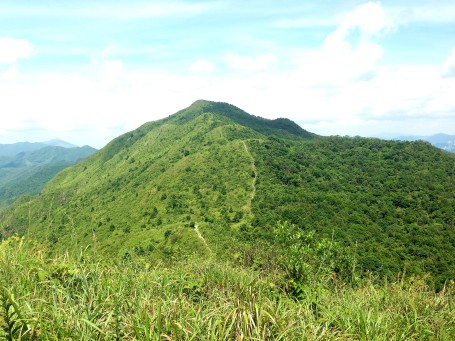
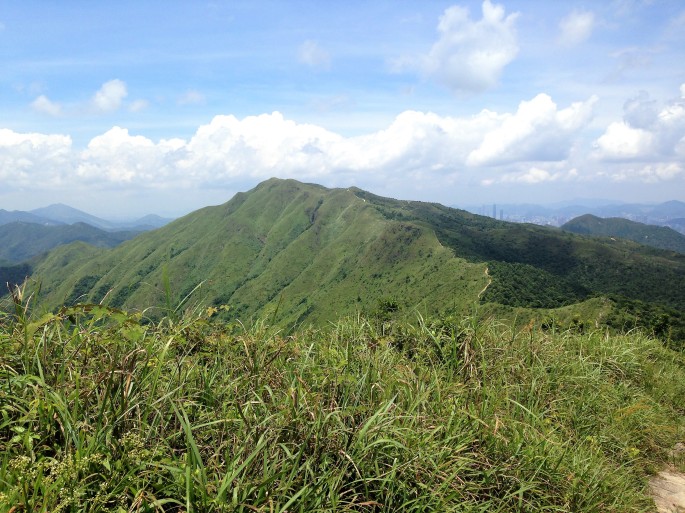
There will be a split in the route after an hour, take the route on left uphill towards the peak of Pat Sin Leng. This is where the trail gets more intense as the ascent become more vertical. This will last for around 700m until you reach the first peak – Hsien Ku Fung! On the left, you can already see parts of Tai Po. On the right, you can see the popular dam that separates Plover Cove Reservoir from Tolo Harbour – a very popular place for photos when biking.
First peak – Hsien Ku FungView from the first peak
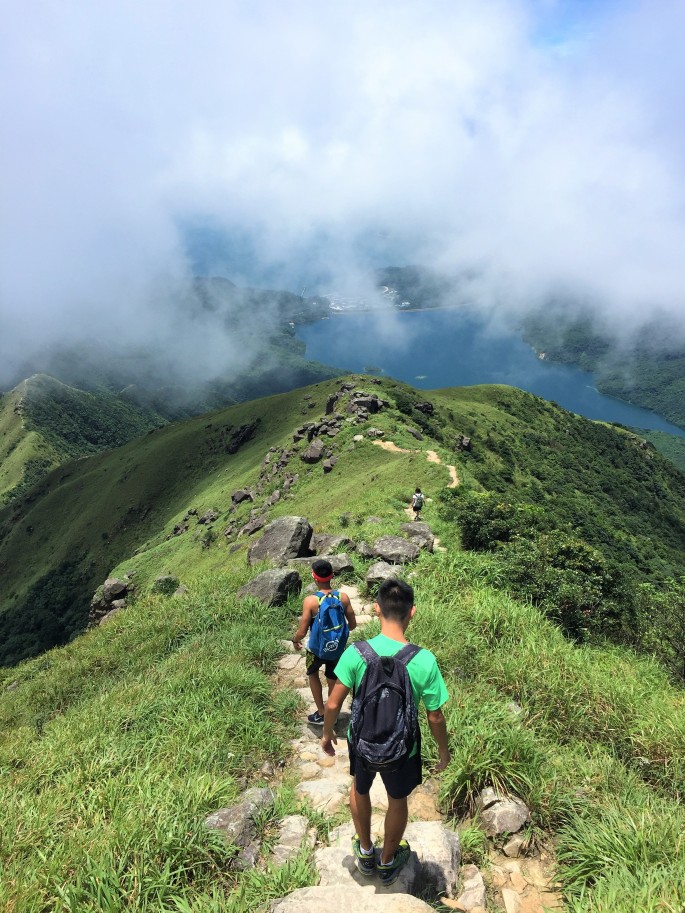
Continuing on, there will be gentle descents and ascents as you hike across the 7 other peaks. The route quite at the top is quite bare and opened to sun, so bring loads of water to drink as well as putting on sunscreen. The view of Tai Mei Tuk becomes clearer and clearer as you move across the peaks – Ma On Shan is visible in the distance, as well as Sharp Peak from Sai Kung. If the sky is clear, you can just about point out Lion Rock. Do also remember to look backwards once in a while to appreciate the view and route you’ve just hiked!
View along the peaks – Plover Cove Reservoir, Sai Kung, Ma On Shan, Lion Rock etc.Walking along the peaks of Pat Sin Leng
The last peak, also the highest, is called Shun Yeung Fung. Here you can really get a nice 360o view of everything – even the buildings of Shenzhen behind the mountain ridges. There are a lot of nice big rocks for you to sit/stand on for photos at this peak.
View from the 8th and final peak – Shun Yeung Fung
Mountain ridges beyond Pat Sin Leng as well as a glimpse of Shenzhen behindLooking backwards from the last peak
To walk back to the beginning, continue walking along the ridges. There are a few ascents, but it is a more relaxed hike compared to the hellish steps at the beginning. You’ll reach some signage soon – take the path on the right where it leads back down to Tai Mei Tuk.
Hiking along the mountain ridges
It’s just slow and steady downhill from then on. There are some loose rocks along the way so do be careful when you descend. Most of the route is shaded from now on. Around an hour later, you’ll reach the end of the trail as you connect back to the road. Turn right and you’ll find yourself at the bus stop of 275K! There are vending machines there if you are dying of thirst or craving for some cold stuff to drink!